Building a home of own is one the most significant investments of one’s life. There are many stages to constructing an ideal home and rubber roofing is one of them. Where a carefully curated architectural home plan ensures the stability of the home. Rubber roofing and Hardie boards protect homes from external damages such as water seepage, and fire, etc. Contact Hardie board suppliers today to install the best fiber cement wall panels to beautify and protect your homes.
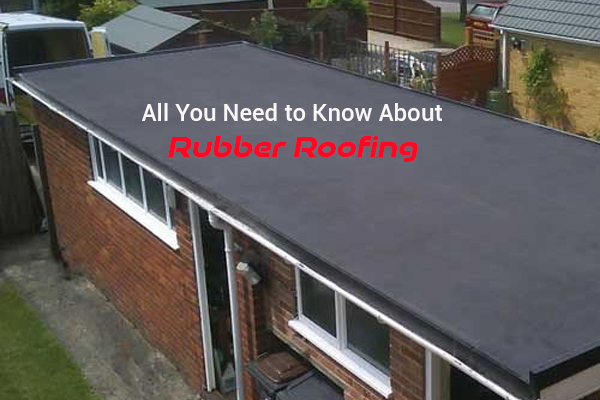
What Is Rubber Roofing?
Rubber roofing is made out of completely recycled materials such as sawdust, slate, and plastic tubes & tires. The slate and sawdust components add resistance, durability, and flexibility to the final product. The roofing is developed in the form of long sheets which are further packaged in the form of a roll. One of the excellent qualities of rubber roofing is its recyclable nature, that it can be recycled again even when it is completely used and worn out. Rubber roofing may not look very aesthetically pleasing, but it can paint with acrylics to enhance the look.
Why You Must Choose Rubber Roofing?
Hardie board suppliers recommend rubber roofing as the best roofing option due to several different reasons. The cost, durability, resistance, and other added properties make it a ready to adapt roofing process. Let’s check out the most compelling reasons to choose rubber roofing for your home.
1- Durability
Rubber roofing comes with a lifespan of 20-30 years and can last even much longer subjected to professional installation and yearly maintenance. Rubber roofing also supports roof-top gardens. You can contact professionals to receive a detailed understanding of the warranty. Period of rubber roofing by searching for “rubber roofing near me.”
2- Resistance
The resistive properties of rubber roofing are endless. It offers the widest coverage against all possible external threats. For example, fire, insects, heat, UV radiations, snow, hail, and wind, etc. The wide-ranged resistive properties enhance. The durability and lifespan of rubber roofing. The ability to lock out moisture resists. The growth of molds and fungi, which adds to the lifespan of rubber roofing.
3- Cost
The total cost of installation depends upon the slope, pitch, and size of the roof. The cost also depends upon the type of rubber roofing and the local labor cost. Generally, it ranges between $4.25-$8.25 per square foot. The average cumulative cost can be up to $8000-$14,000. When compared to asphalt shingles. It may seem more expensive but it saves energy costs and even last longer. The UV-resistant rubber roofing saves a huge chunk of energy costs. By trapping heat in winters and reflecting it in summers.
How Rubber Roofing Is Installed?
One of the added advantages of rubber roofing is its easy and hassle-free installation. No heavy machinery and welding tools are required. to complete the process as is the case with asphalt shingles and metallic roofing.
However, a professional must hire to inspect the roof. it marks all the nicks and holes before installation. It would enhance. The performance in the long run. Looking for “rubber roofing near me” would present you with several professional services to choose from for roofing installation.
There are three simple and sleek steps. To the installation of rubber roofing so let’s check out.
1- Inspect
It is imperative to be aware of all the nooks, ditches, and holes present on the roof to perfectly seal them. Stripping out the previously installed roofing works best to have a clear picture. Also, several manufacturers do not offer warranty claims. If the roofing is installed on top of already present roofing. Take measurements of chimneys, vents, and pipes, etc. To cut rubber roofing accordingly.
2- Prepare
The next step is to prime your roof for a foolproof installation process. Use the detergent solution to remove mildews, molds, and remaining adhesive present on the floor from previous roofing. Wipe off dust, dirt, and debris with water and allow it to dry completely. Adhesive applied on the wet surface would decrease the efficiency of the process. As a result, it would not stick properly resulting in gaps and vents.
3- Rollout
The final step is to spread out the roof roll. It makes cuttings as per the noted dimensions. Trim around pipes and chimneys. To fix it properly on the roof. Next, start applying the adhesive. It is sealant from one side and keeps looking for air bubbles. After the completion of the adhesive application. Await for half an hour to allow it. To sit and glue with the surface. After that, make any necessary adjustments. Before completion of the adhesion process.
How To Take Care Of Rubber Roofs?
The life of depends a lot on maintenance. Maintenance is much inexpensive to manage and requires minimal professional help. However, regular evaluation is imperative. Meanwhile, to ensure that there are no hidden gaps, cuts, or other possible damages. That might reduce the lifespan of the rubber roofing.
However, keep removing twigs, debris, and other pointed objects from the roof periodically. Avoid walking on the roofing with pointed shoes. As it might damage the roofing. Use sealant or butyl roof tape to seal any visible crack and gap etc. Using a caulking gun help achieve precision in sealing the vents and holes. If there are mildews or molds in any nook or corner, use detergent to remove it. However, do not use the hard-bristled brush. As it will bruise the surface of rubber roofing. Consider contacting Hardie Board Suppliers Calgary near you for a more detailed care regime.