Introduction
Ceramic tile flooring is a popular choice for homeowners because it’s durable, easy to clean, and comes in many styles. Whether you’re remodeling a bathroom, kitchen, or living room, installing ceramic tiles can give your home a fresh and modern look. However, ceramic tile flooring installation can be tricky if you’re not familiar with the process. In this article, we’ll share expert tips to help you install your ceramic tiles with confidence and achieve a beautiful result.
1. Prepare Your Space Properly
Before starting any flooring project, preparation is key. Make sure the area is clean, level, and dry to ensure a smooth installation. Follow these steps:
- Clear the Room: Remove any furniture, appliances, or existing flooring. This includes baseboards, moldings, or carpets that may get in the way.
- Check for Levelness: Use a level tool to ensure the subfloor is even. If there are any high or low spots, use a leveling compound to fill in the gaps and create a smooth, even surface.
- Clean the Floor: Sweep and vacuum the area thoroughly to remove dirt, dust, or debris that could affect the tile adhesion.
2. Choose the Right Ceramic Tiles
Selecting the right type of ceramic tile is important for the durability and style of your floors. Consider these factors:
- Tile Size: Larger tiles make a room look bigger but may require more skill to install. Smaller tiles, like mosaics, are easier to handle but take more time to grout.
- Tile Design: Ceramic tiles come in various designs, colors, and patterns. Choose a style that complements your home’s aesthetic and your personal taste.
- Durability: Ensure the tiles you choose are rated for floor use. Some tiles are better suited for walls or countertops, while others are designed for high-traffic areas.
3. Gather the Right Tools and Materials
Proper tools can make a huge difference in the success of your ceramic tile flooring installation. Here’s a list of essential tools you’ll need:
- Tile Cutter or Wet Saw: For cutting tiles to fit around corners or edges.
- Notched Trowel: Used to spread the mortar evenly on the floor.
- Mortar and Adhesive: To stick the tiles to the subfloor. Choose a high-quality thin-set mortar for strong adhesion.
- Tile Spacers: These help maintain even gaps between tiles for uniform grout lines.
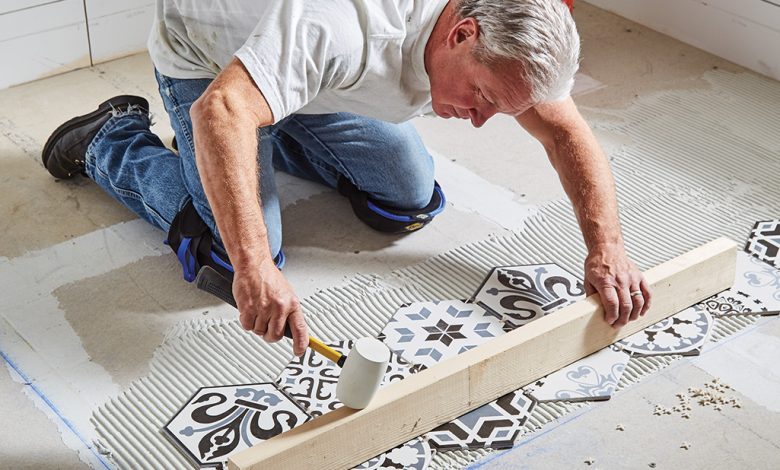
- Rubber Mallet: To gently tap the tiles into place without cracking them.
- Grout and Grout Float: Grout fills in the spaces between tiles, and a float is used to apply it evenly.
- Level: Ensures that each tile is set properly and aligned with the others.
4. Plan the Tile Layout
Planning your tile layout is one of the most important steps in the installation process. It helps you avoid ending up with uneven tiles along the edges of the room. Follow these tips:
- Start from the Center: Mark the center of the room and work your way outwards. This ensures that your tiles are symmetrically placed.
- Dry Layout: Lay the tiles out without adhesive first to get a feel for the layout and make adjustments if necessary.
- Cut Tiles Near the Walls: You may need to cut tiles to fit around walls or obstacles. Measure the spaces carefully before cutting to avoid mistakes.
5. Apply Mortar and Install the Tiles
Once your layout is planned, it’s time to start installing the tiles.
- Spread Mortar: Use the notched trowel to spread a thin, even layer of mortar on a small section of the floor. Only work in areas where you can install tiles before the mortar dries.
- Place the Tiles: Press each tile firmly into the mortar, starting from the center and working outward. Use a rubber mallet to tap the tiles into place gently.
- Use Tile Spacers: Insert spacers between the tiles to maintain consistent gaps for grouting later.
- Check for Level: As you go, use a level to make sure each tile is even and aligned with the others.
6. Cut Tiles for Edges and Corners
When you reach the edges or corners of the room, you’ll need to cut tiles to fit. Use a tile cutter or wet saw to make precise cuts. Measure carefully before cutting to avoid mistakes, and always wear safety goggles to protect your eyes from flying tile shards.
7. Let the Mortar Set
After all the tiles are installed, allow the mortar to set for at least 24 hours. Don’t walk on the tiles during this time to prevent shifting or damage.
8. Grout the Tiles
Once the mortar is set, it’s time to grout the tiles. Grouting fills the spaces between the tiles and gives your floor a finished look.
- Apply the Grout: Use a grout float to apply the grout to the gaps between the tiles. Work in small sections to avoid the grout drying too quickly.
- Clean Excess Grout: After applying the grout, use a damp sponge to wipe off excess grout from the surface of the tiles. Make sure the grout lines are even and smooth.
- Let the Grout Dry: Allow the grout to dry for about 24 hours before walking on the tiles or applying any sealant.
9. Seal the Grout
Once the grout has dried, apply a grout sealer to protect it from stains and moisture. This is especially important in high-moisture areas like bathrooms and kitchens.
Conclusion
Ceramic tile flooring installation may seem challenging, but with the right tools, preparation, and technique, you can create a beautiful and durable floor. By following these expert tips, you’ll be able to install your ceramic tiles with confidence. If you prefer professional help for a smooth and hassle-free installation, don’t hesitate to reach out to experienced floor tile installation experts who can ensure top-notch results.