Oil leakage from the truck rear cover is a problem that needs to be dealt with in a timely manner, because oil leakage will not only cause a waste of resources, but may also affect the normal operation of the vehicle and even cause safety hazards. The following are the steps and methods to solve the oil leakage from the truck rear cover:
1. Confirm the location of the oil leak
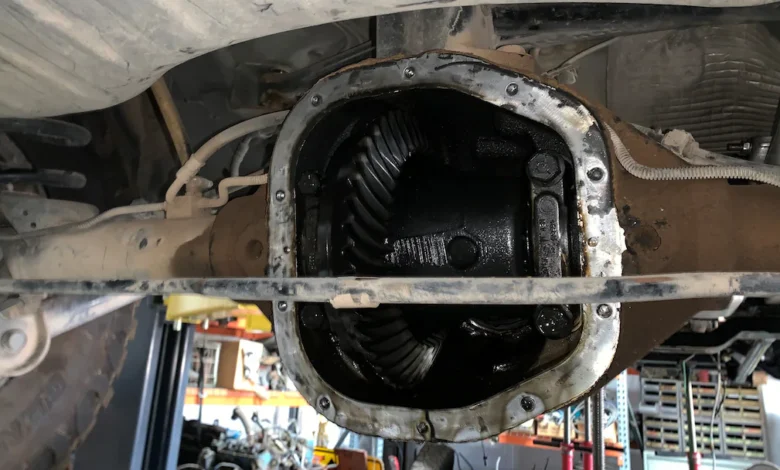
– Check the rear cover area: First confirm whether the oil is indeed leaking from the rear cover. Sometimes the oil may leak from other parts (such as the engine, oil pan or oil pipe) and flow to the rear cover area.
– Clean and observe: Clean the rear cover and the surrounding area, then start the vehicle and observe to find the specific location of the oil leak.
2. Common causes of oil leakage and solutions
– Aging or damage of the rear cover gasket: Replace the rear cover gasket. Remove the rear cover, clean the contact surface, install a new gasket, and ensure that it is firmly installed.
– Loose rear cover bolts: Check and tighten the rear cover bolts. If the bolts are damaged, replace them with new bolts.
– Deformation or cracks on the rear cover: If the rear cover is deformed or cracked due to collision or aging, the rear cover may need to be replaced.
– Overfilling: Check the oil level. If there is too much oil, drain the excess oil to the normal level.
3. Repair steps
Tools and materials:
– New gasket or rear cover (as needed)
– Wrench or socket tool
– Cleaner (such as carburetor cleaner)
– Rag or paper towel
– Sealant (if necessary)
Steps:
1. Park and cool: Park the vehicle on a flat surface, turn off the engine and wait for it to cool.
2. Drain some oil (if necessary): If the oil level is too high, use the drain screw to drain the excess oil.
3. Remove the rear cover: Use the tool to remove the rear cover bolts and carefully remove the rear cover.
4. Clean the contact surface: Use a cleaner and a rag to thoroughly clean the rear cover and engine contact surface to ensure that there is no oil or impurities.
5. Replace the gasket or rear cover: Install a new gasket or rear cover and ensure that the installation position is correct.
6. Apply sealant (if necessary): Apply an appropriate amount of sealant on the gasket or contact surface to enhance the sealing effect.
7. Reinstall the rear cover: Reinstall the rear cover and tighten the bolts. Note that the bolts should be tightened step by step in diagonal order to ensure uniform force.
8. Check the oil level: Start the vehicle and run it for a few minutes to check whether the oil level is normal and observe whether there is still leakage.
Preventive measures
– Regular inspection: Check the oil level and the sealing of the rear cover regularly to find and solve the problem in time.
– Use high-quality accessories: When replacing the gasket or rear cover, choose accessories with reliable quality.
– Avoid over-tightening: Avoid over-tightening when installing the bolts to avoid damaging the gasket or rear cover.
Seek professional help
– If you cannot determine the cause of the oil leak or cannot solve the problem yourself, it is recommended to contact a professional repairman for inspection and repair.
If you choose the toyota tundra tonneau cover of OSIAS, we will provide you with professional guidance and answer your questions.